Some hints for you if you decide to lay your own floor:
These tiles had 2 patterns on them, sometimes the glue
strips would be reversed, but still only the 2 patterns. Now because I have
OCD, I used a minimum of 3 boxes at a time, which had 8 strips of tiles, and
stacked them to match in their own piles; I did this for several reasons.
First I will try to show you the patterns:
See the two marks?
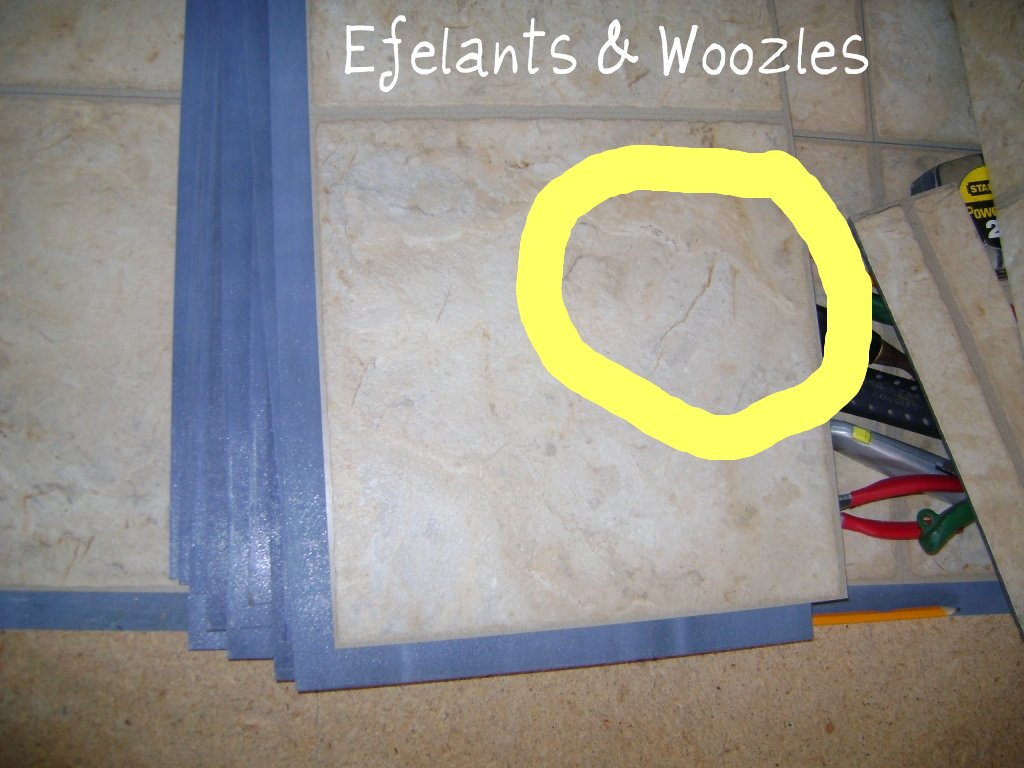
Well this one doesn't have those marks, it has this distinguishing feature though. You will need to zoom in to see (at least I did ;) )

Here is what I mean saying the glue strips are reversed

It has the same exact markings but notice the glue strips? If I match the markings, then the glue strips didn't match.
So I made four stacks as to me it was easier to make sure first I had the right piece in the right direction THEN make sure the pattern wasn't going to be side by side :) This is only 3 stacks, because I had already gone through 3 1/2 boxes! So as you can see not all the boxes switch things up.

I would open at least 3 boxes so I could have a good
selection and not repeat the patterns so obviously, also staggering or
stair-stepping the joints helped to not repeat too.
 |
| See how it is stair-stepped? |
Another reason to use
multiple boxes is because sometimes the dye lot is not exact. Kind of like when
buying yarn, you need to get it all the same dye lot or it may not match
perfectly. It’s the same for the flooring, the colors may be off by just a
hair, but if you use multiple boxes and switch them out etc., you won’t have a
darker or lighter patch of floor.
So if you stack your tiles according to pattern & the glue
strips etc., then as you’re laying the floor it can be a no brainer and you
just get one from each stack at a time. And with stair-stepping you REALLY don’t
have to worry about repeating yourself.
Starting the floor.
My uncle started laying the floor at the beginning, now I am
not bashing him, as he admitted he had never done this before either; however,
he didn’t even try to read the directions for the floor! So our starting point
was where he had left off (he had been called back to work) and we then had to
work around those issues. We DID pull up the floor just laid in the dining room
and kitchen as I showed in this post. And I keep kicking myself
for not going ahead and pulling up the floor in the den – which was basically
completed so we worked the rest of the floor off that.
The problem was he had squared up the floor using the outer
walls, when we should have used the longest inner wall. Then the wonkiness of
the walls would not have been so obvious. But mom is ok with it and is happy
with her floor… but it’s my OCD kicking in ;) So when you start laying your own
floor use the longest inner wall to lay your chalk lines to guide you (there
are all kinds of tutorials on how to do that).
One of the glaringly obvious issues that happened because of
it, is having to put a threshold where the hallway meets the kitchen. I can’t
believe I did not get a pic of it, but den leads into the dining room which
leads to the kitchen that then leads back into the den – it makes a circle…
which didn’t meet well J
hence a threshold.
Also another issue that popped up is the tile was laid long
ways, the trailer is rectangular. This
is also a double-wide, so the seams of the two halves run straight down the
middle long ways. The tiles are also rectangular and they were laid to run the
length of the trailer. It would have worked MUCH better to run them crosswise
instead. It would have laid better over the seam of the two halves of the
trailer and also would have been able to avoid using a threshold.
Enough about that, just if you should decide to do this,
please really sit down and THINK about layouts and such!
On to other hints…
DO NOT throw out your “waste” until you are DONE with the
floor!!!! When you “stair step” your seams sometimes you have to follow a wall
and cut off portions of your tile to line things up correctly.
 |
| Starting a row and trying to line up grout lines while trying to stagger seams |
 |
| Same row, finished and in place - note seam from previous row |
What you cut off
of one end or side of the tile may be able to be used at the other end of the
room!
 |
| The rest of the tile from above to start a row was used to finish the row |
Or you may need just a bit of the glue strip for a very small section –
these tiles are expensive! You don’t want to waste a WHOLE piece just cuz you
need a 1 inch strip!
For example:
 |
| This is a bit larger than one inch - but still to waste a whole piece of tile for that little bit to finish the row? Also see how there is only half the width of the tile along the wall? |
 |
| Now just need to mark where to cut for the wire coming up and will fit right in place |
Here are our piles of “wasted” tile, you also get an idea of
why I said when you order your tiles, get about 15% more:


Mom ordered 80 boxes of the tile, kept one box
along with some of the “good” “wasted” tiles and returned 4 boxes. Each box
covers 24 sq. ft., which means 1800 sq. ft. was either used or trashed. Her
house is 2028 sq. ft. including the deck and approximately 1750 sq.ft. of living space... So we did GREAT on keeping the waste to a minimum! At $52 a box, WOOT!!!! She was going to be charged about $10,000 for installation because they charge for each angle and cut they have to make plus the square footage, and as you can see in the pictures, there were a LOT of angles to cut! Also when she returned those four boxes, she got $220 back, which paid for her new trim. Altogether, she is very happy :)
Tomorrow I will show you one hint I am really proud of…
besides figuring out to use the dremel for cutting, actually laying the floor,
mom and sister not noticing there were only 2 different tiles, measuring without
being able to see a tape measure, and not killing myself in the process!
So check in tomorrow for this new use of something TOTALLY
not intended for this purpose!
No comments:
Post a Comment
Comments are always appreciated and I try very hard to reciprocate!