Friday, March 30, 2012

New Floor... Almost - Part 3

Hello Blogland, no excuses – just pure tired!

A little late, how to measure the “tiles” without a tape measure. But I would like to explain first the reason we are not using a tape measure… I can’t see the measurements well enough J! So I use a scrap piece of the tile for reference. I will show you below.

First we had to finish this row of “tiles” for under the stove, which of course had to go around the cabinets…


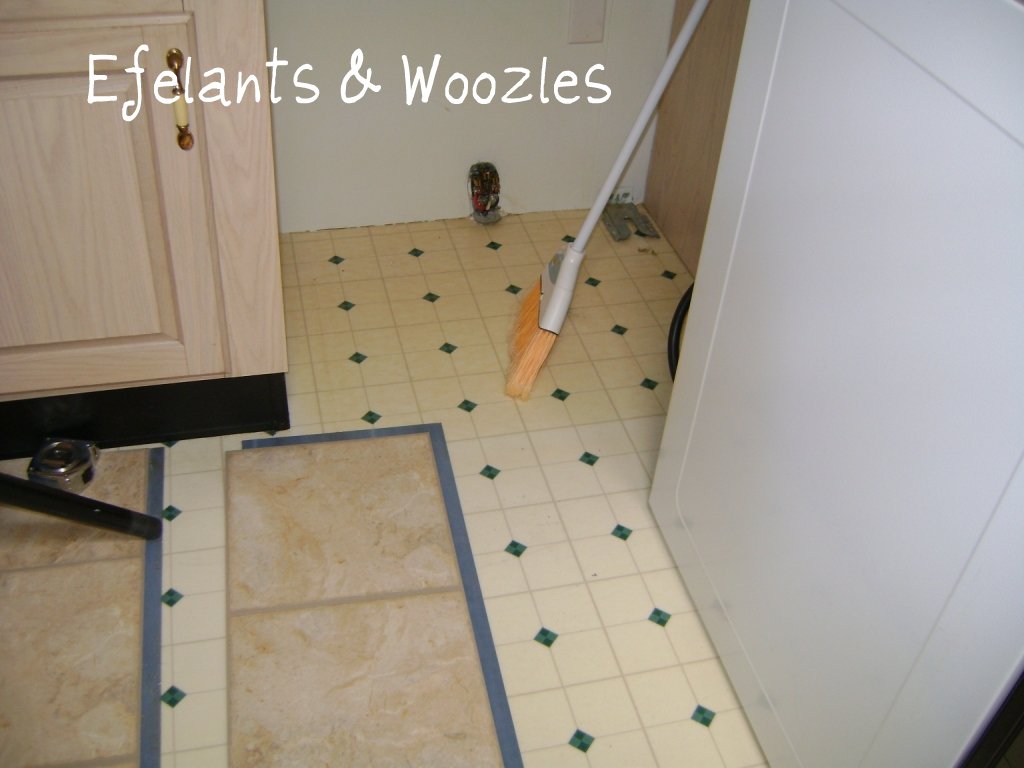
Lay the “tile” directly in line with where it will go along the edge, like so:


Mark the edge of the cabinet (we will call this Line A)


Now lay the piece you are trying to fit against the end of the row it will be fitted to, this will get you the length to the cabinet:


Mark your length:


Now get you something with a straight edge and place alongside the base of the cabinet and place to run across the “tile”, this will get you the angle you need to make it fit (remember these cabinets/walls are all cockeyed!)


Mark your line and then Connect your mark from Line A


I put an “X” on what we are cutting out, so the son will know which side of the line he should cut on – ie: the “trash side” because it is always easier to shave/sand an edge that is too long than it is to have a piece too short! Plus while he is cutting I am measuring for another tile… and well I will forget what was for what if he asks!!! So the “X” helps both of us ;)


“Tile” in place


Now we have this strip – the LAST pieces for the kitchen – WOOT! The problem is I can’t get a good measurement. Don’t know if you can tell, but it’s not exactly a straight line (and really and truly it is not the tile! We measured the cabinets… about a ½ inch difference!!!!) SO, this is my other “trick”…
Lay your piece you are trying to fit directly on top of the piece beside it:


Just make sure it is EXACTLY on top, I moved this aside so you could see what I was talking about!
Now get you a scrap piece of the tile and lay it against the cabinet and follow along the edge to mark what needs to be cut off:


Now have your son cut it J This stuff is EXTREMELY dusty when you use the dremel! Wear a face mask and safety glasses!


Doesn’t he do a great job?


The kitchen is done! (well for the floor anyway J)


Now hopefully I haven’t confused you or bored you to death! But really and truly it is not difficult to lay these “tiles” It is definitely intimidating, especially when it’s not your own floor! If it were my own, I wouldn’t be very picky, but this is momma’s floor.

We will also be laying quarter round moldings along the baseboards which will help hide any squiggly lines along the edges to the walls! 

Sunday, March 25, 2012

New Floor... Almost - Part 2

Sorry blogland, I was tired and sore yesterday from all the up-downs and the floor. BUT I have some Do's and Don'ts advice!

DO take the time to prep the floor:
 mom's trailer is a double-wide, and she swears that whoever laid the linoleum and carpets were paid by the staple :D In some areas I bet there were 10 staples in a one inch area (no exaggeration! Do you see that speckled stuff along the seam? That is not dirt - it is from all the staples!) The staples to hold down the carpet need to be pulled out or hammered flush to the subfloor. Even though this is a "floating" floor we are putting down, if there is a bump up - it WILL show!
 Also, watch for the subfloor joints... they were paid by the staple here too.
See this? It can totally ruin the floor if you leave it! Hammer them in (don't pull the subfloor joint staples out... it's not a good idea! hehe)


DON'T run your hand along the floor to feel for the staples, use the hammer's head to slide along the floor, you will feel any raised staples that way and not get splinters.

DON'T lay this type of flooring in solid rows like this:
We pulled all this floor up, CAREFULLY, and then laid it with the joints staggered. With the way it is designed, staggering the seams help lock the floor in place, and also helps you stay "square". The floor can be reused, you can re-activate the glue by using a blow dryer to heat it up, which also works when / if you need to replace a piece later (like when a dogs chews up a corner or something ;) )


DO stagger the seams!
See how it is staggered now? Works MUCH better.

Now, because this floor only has the glue strips on the edges, this poses a whole other set of "challenges". You can't cut and piece them together, well you can, it just doesn't look right, plus you lose a glued edge!
Remember these are three tiles long, so in the pic you can see on the left how far back it goes along this bump out wall.

The Dremel Tool with cutter wheel and sander is your FRIEND!
They say you can use a razor blade, score it and "snap" it.... Yeah, for a STRAIGHT cut, maybe even an "L" shaped cut. But NOT for half the length of the strip! So use a dremel tool. Makes life SOOOO much easier.

Same bump out


Here are some of the CRAZY angles we have been dealing with:


Keep in mind a couple of things. This is a trailer, I have yet to come across any that have squared, right angle, walls - but this is ridiculous! Some of these angles are not even 45 degrees! We don't have an adjustable angle either (another nifty little tool). Also, we have NEVER laid tile before, much less a "floating" floor. Son and I got a great working system going, I will do the measuring and the marking and he does the cutting, and we BOTH lay the floor.


Tomorrow I will show you how we figure out how to cut the tiles to fit... without a tape measure.


Friday, March 23, 2012

New Floor...Almost

Some of you may be wondering if I have disappeared. I haven't, just been busy! I went to mom's last Thursday and she is putting in a new floor. My Uncle came out and got us started on it before he was called back to work... which left it to us to finish. And boy, did/do we have a LOT to figure out!

Here are the Before Pictures:

 as you can see - the carpet was funky :( yuck. Which is why momma wanted it GONE!


This is the flooring we are putting in:
The "tiles" under the boxes are what it looks like. It is the kind that has three tiles in a row, so if you have a big open space to do - the floor lays down QUICK... If you have a lot of angles / corners, you are going to have a lot of waste - so if you are looking at this kind of floor for your home - order accordingly! Most say figure about 10% waste, I say with this floor, if you have a lot of angles, figure about 15%. Keep in mind you have to match the glue strips etc, its not like laying actual tile!


Tomorrow I will show you some of the CRAZY angles we have been working with!

Thursday, March 15, 2012

Crockpot Glazed Cinnamon Coffee Cake

I found a recipe from Smashed Peas and Carrots that I wanted to try. It turned out fairly good :) The recipe and step by step directions are here.

This is how mine turned out. I don't expect it to last too long ;)


I couldn't wait for it to cool ;)

Wednesday, March 14, 2012

Stash Buster

O.k. a lot of my friends and family tease me about the fact that they have to ask before they can throw something away. I try very hard to use something up so much that it then becomes totally useless and can be garbage ;)

For instance all the sewing I have been doing, I have had little bitty pieces left over that I don't particularly want to sew back together!
But I save them. And as I get a bit, I make sure they are cut up small and use it to stuff little "Happies" like this:
Little dust collectors ;)
or even something fairly useful, like this:

Originally I found the original patterns at R&K Creations... here. But then once I learned the techniques behind it, I then did my own thing and made my own pumpkin patterns, and my own way of sewing them. And really after I have made a few, I tend to change something, a new technique or idea I saw, so I honestly don't remember exactly what their directions entail! So all my little pumpkins are totally different, and I like that :D

But that is why I save all the little bits and pieces for. And IT WORKS :)

Tuesday, March 13, 2012

More Mug Rugs

Hello All,

I have been busy the last couple of days, and I was going to blog about it yesterday, but I wanted to enjoy the award ;) I was (am) tickled pink about it.

But on Sunday I was able to finish 4 more mug rugs, 2 exactly like the ones before and 2 that were done "Krazy Quilt" style? I think? Well, whatever it's called I had fun with it :) And I truly hope the recipient enjoys them :D

The two on the left are the ones I made the other day and the four on the right are for my friend.


Not perfect, but made with love.


Sunday, March 11, 2012

Liebster Award


How sweet, Mad Hen at Fluff and Feathers nominated my blog for the "Liebster Blog" Award! Thank you so much Mad Hen! I am smiling ear to ear :) Oma will be proud ;)

I am going to copy and paste the meaning of the award from her blog...

Liebster is a German word, meaning dearest or beloved, but it can also mean favorite. The
idea behind the Liebster Blog Award is that it is given to talented and/or loved bloggers who have less than 200 followers in order to create new connections and to bring attention to these wonderful blogs! 
There are a few rules that go along with accepting the award:


- Thank your Liebster Blog Award presenter on your blog.
- Link back to the presenter who presented the award to you.
- Copy and paste the award on to your blog.
- Present the Liebster Blog Award to 5 blogs with 200 followers or less who you feel deserve to be noticed.
- Let them know they have been chosen by leaving a comment on their blog.
There are several I would like to pass the award on to:


Home In Greece whose common sense and advice and insights are very thought provoking.

My Simple Life whose sincere simplicity and grace shines through her writing. WOOT! She was nominated by The Juggler! Her blog is worth a looksee too (or three ;) )!

There Is More To Being A Domestic Goddess Than Bon-Bons surely the title says all there is to say about her sense of humor!

A Day in the Life of a Frugal Foodie Fair warning - do NOT go to her site HUNGRY!!!! Deliciousness on those pages :)

I will have to stop here, there are so many though!!!!

Thank you again Mad Hen. :D


Thursday, March 8, 2012

Mug Rug


I made me some “Mug Rugs”. I figured it would be the perfect opportunity to try out some different techniques, quilting, binding, different quilt blocks, etc. They are small, quick, useful, and if I mess up I have not devoted a huge amount of resources to it. Also on another craft forum I joined a “Craft-A-Long” or in this case a “Use-Up-Your-Stash-Along”. So right up my alley!

I found some green material in my stash that I liked, the challenge this month is to use up something green, which was an old Halloween costume (Peter Pan) that was my daughter’s. Some fun funky material that was one of my son’s shirts, and some aqua blue material that was daughter’s capris. All this I had saved to re-use at some point… although I didn’t expect to wait 15 years!

ANYWAY…

 I started simple, a basic four block with each block at 4 inches. I wasn’t going to get all technical on my first try and ease into it J.

Then I figured out my backing, an old 1960’s/1970’s polyester knit, pantsuit, type material that was green (I know it looks blue in this pic - camera phone!)

Sewed the blocks together using a half inch seam, I need all the room I can get because I cannot see what I am stitching (unless I get to within 3 inches – NOT a good idea!) So I sew by general blur and blobs ;).
I made sure to iron my seams open. 

I love my craft room because I have my ironing board set up right behind me and a little lower than normal so all I have to do is swivel around in my chair and iron the bits and pieces as needed!

Once I had the four blocks together I debated for quite a while on whether I wanted any batting in between the layers, and decided against it. Then I put my backing and my block together, right sides facing, and sewed around (another half inch seam) making sure to leave an inch or two to be able to turn right side out. Trimmed the corners and the edges, making sure NOT to trim my turning area so it will be easier to sew closed later.
 It's hard to see but the opening is in the upper left corner.

Turned it right side out with my handy dandy chop stick and ironed it flat, being sure to turn in the seams at the opening where I turned everything right side out. Then I top stitched the whole thing, including the opening to sew it shut. This time though a ¼ inch seam.

I thought it needed SOME type of “quilting”, so I quilted in the ditch (sewed where the blocks meet).

I liked the results so much, I made TWO! So can have matching ones (if I so choose) for when daughter comes home and we have tea together J


Action shot ;)

I think I like this!


And just because I love to learn little tips and tricks others use, this is mine:
I keep a piece of tape by my sewing machine to put all my little pieces of thread I cut off onto the tape so it doesn't get all mixed up on the fabric when I am sewing. The tape keeps it all together and AWAY from my project!